I was recently tasked to implement an integration between two systems of a customer. The task was to receive a XML-payload via a IBM WebSphere MQ Server hosted in their infrastructure, so my job was to implement a simple proof of concept.
We decided to give it a go with a .NET client, as almost all of our team has expertise in the C# programming language, so I started examining the .NET ressources for this API.
Installing the MQ-Server locally
After reading through the documentation, I decided to install the developer edition of the MQ-Server on my local machine (win10) to give it a try. You can download the developer edition here (Current version as of this blog post was 9.05).
Unzip the installation files into a directory of your choice and start the Setup.exe.

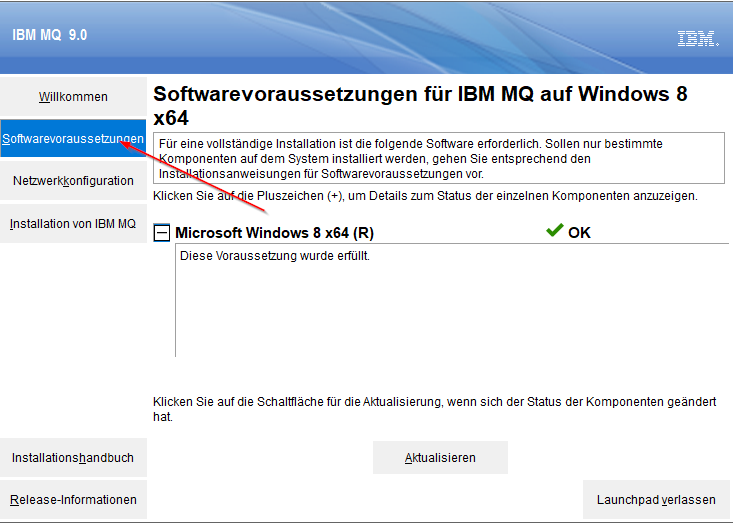
After starting the installation wizard, you will be prompted to check if the system requirements are met by your computer.
In the tab “Network Configuration” choose the second option “No” if you don’t wish to run the MQ-Server with an AD-User.

In the last step you can choose the language of your local installation and then start the installation on your system.

For my first installation I chose the installation type “typical”, but you can change the installation location by choosing the installation type “custom”. You can also change the data folder and installation name if you choose the custom type. You can leave all other options at their default values for the time being.

After the server finished the installation, a second wizard opens for the configuration of the service instance. You can leave the default values if you install the server on a machine that is not in a network with a domain controller. After the configuration finished, you can start the IBM MQ Explorer.

Create a new Queue Manager
After starting the IBM MQ Explorer you will be greeted with the welcome page of the explorer. To understand the components of the IBM MQ Infrastructure, I recommend to read the redpaper “Websphere MQ Primer: An Introduction to Messaging and WebSphere MQ”.
To give a brief explanation: The MQ-Server consists of several queue managers which may contain several queues that can be used for asynchronous communication between applications.
We start off by creating a new Queue Manager in the MQ Explorer. To start this off, you can right click on the left navigation node named “Queue managers”:

Choose a name for your new queue manager and hit the finish button to create the queue manager.

After a short waiting time your new queue manager will be visible in the left navigation panel of your MQ-Explorer.

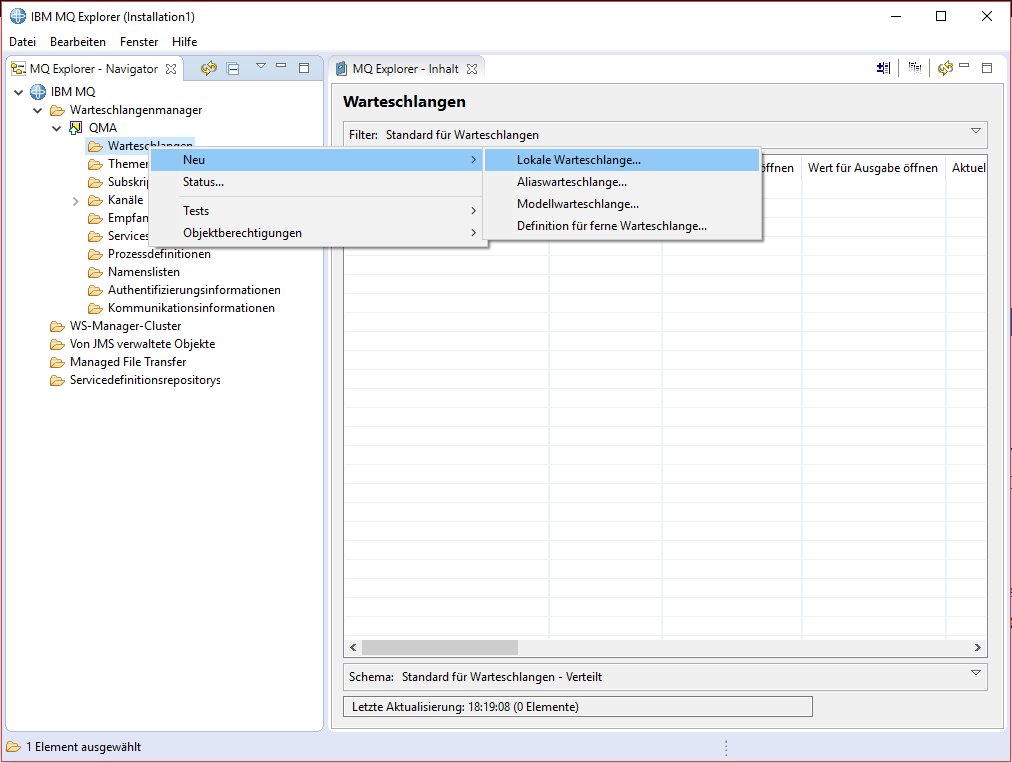
Create a new Queue
After creating the queue manager you are set for message delivery. Your last step before sending your first message is to create a queue for your queue manager.
To create a new queue, expand the navigation node of your queue manager, right click on “Queues”, expand “New” and choose “Locale queue”.
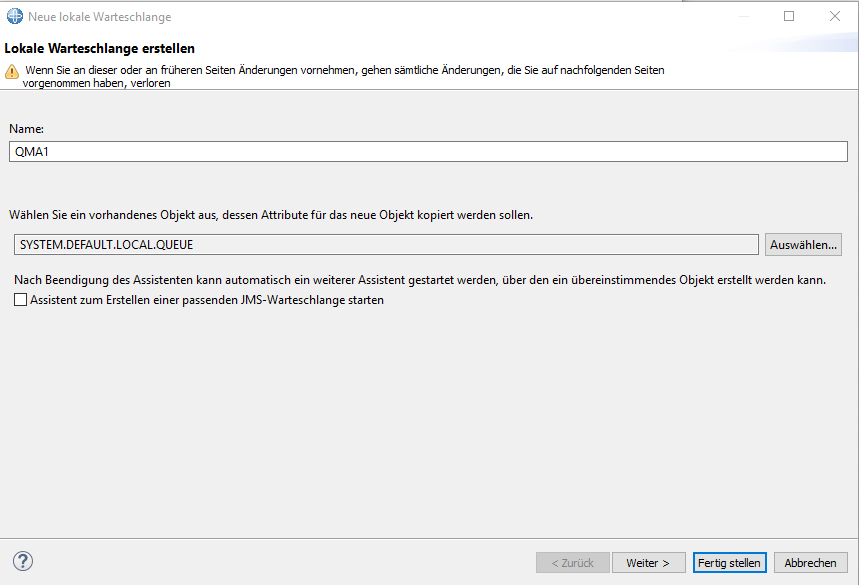
Enter a name for your new queue in the opened dialog and hit the finish button to create your new queue.
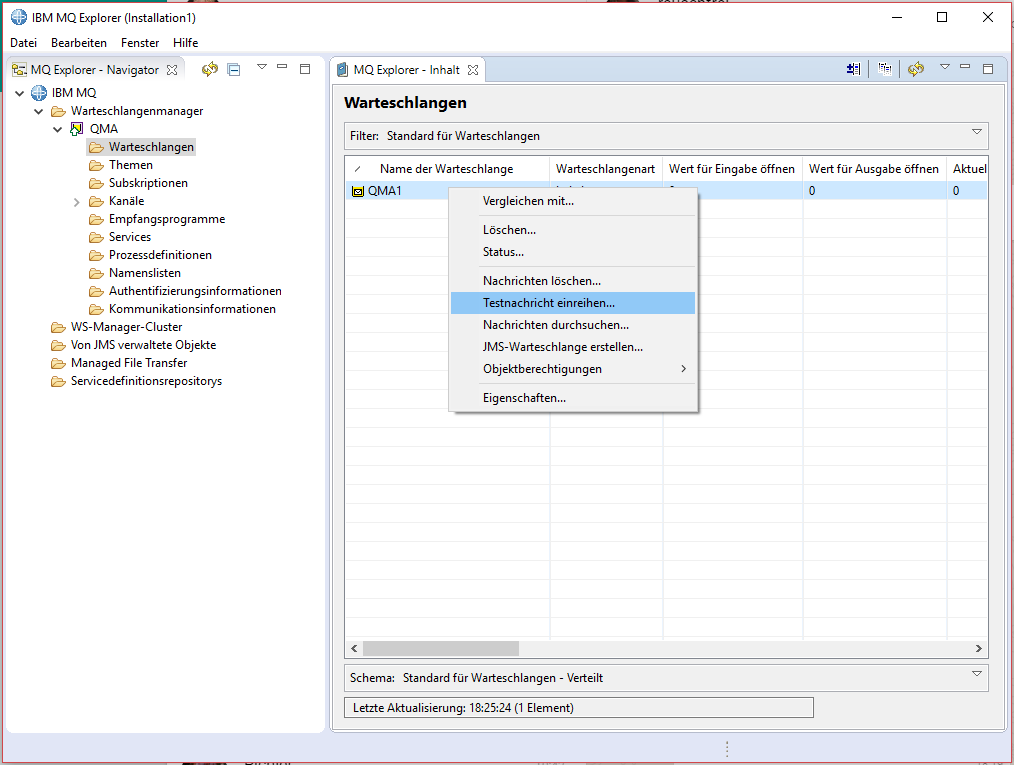
If the creation was successful, your new queue will be shown in the list of queues of your queue manager.

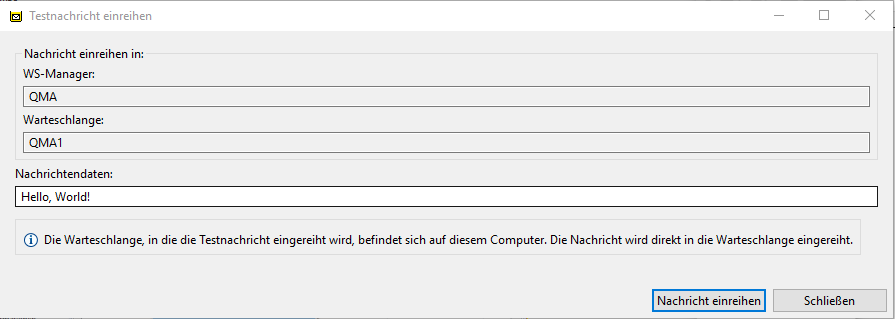
Sending test messages to your queue
To send a test message to your queue, right click on the queue in the list view of queues of your queue manager and click on “Queue test message…”.
You can now enter any message you like to send to your queue. I went with the famous “Hello, World!” string.
After hitting the send button, you can send more messages of close the dialog if you are done with sending messages to the queue. To view the messages in the queue you can right click on the choose the option “Show messages” in the context menu.

In the opened dialog you can see all messages, that are currently in your queue and waiting for processing. This view may come in handy in the next part of this series, when developing the C# client.

Conclusion
In this blog post I have shown how to install the developer edition ofIBM WebSphere MQ Server locally. In the next part of this series I will show you how to write a simple C# client that can send and receive messages from your created queue.
Hello, that’s an interesting topic to discuss. Agree with an innovation that you share through this article. Could I add some points?